Labels

Sunday, October 9, 2011

Food Truck Love: Gennarinos

Many of you might not be aware, but there is a food trunk invasion taking place in DFW.  There are trucks for any and everything you could possibly imagine!  I have been avidly stalking food trucks on Twitter, and have taken to following Big D Food Trucks blog that gives me up to date info on where trucks are rolling.  I was super excited when trolling Big D's blog to see a food truck near 635 /MacArthur one day last week, and the husband and I headed over.  While it was a little hard to find the truck (it said Walgreens parking lot and was actually in a bank lot)  we saw the cutest little food truck and walked on over.  When we walked up, there was a man talking with a customer in the neatest Italian accent I have ever heard.  We were handed menus from the men working in the truck, and made a couple of selections.  We tried the lasagna, spaghetti pizza, timbolo rosso (fried spaghetti and meatballs), and the nutella zeppalones, little Italian donuts.  We also had two raspberry Italian sodas, topped with whipped cream.  We really liked that they had two fold down bistro tables, so we could stop and eat our food right off the truck.  All the food was fantastic, and very affordably priced.  The proprietors of the truck were fun to chat with, and we had a great first food truck experience!  We will definitely be hunting them down again soon!  See below for some pictures of our meal, and check Gennarinos out on Facebook!

Where the magic happens!

Raspberry Italian soda and Spaghetti Pizza!

Timbolo Rosso.... my favorite! :)

Timbolo Rosso, the inside!

Nutella Zeppalones

Gennarino's lasagna, so good! :)

Tuesday, February 1, 2011

Taco Pizza

I saw a fellow blogger post a picture of a Taco Ring, and it looked really good!  I actually planned on making it last night but had no meat! :)  I braved the Snowpocolypse today to drive to Kroger, and stocked up on enough meat to get us to Ash Wednesday.  We go meat free for Lent, so we have to get our protein in now!  I modified the recipe I found on Pampered Chef to be a pizza, and it came out great!  We sliced the pizza with the pizza cutter and added out toppings on top.  We had sour cream, salsa, black olives and shredded cheese, but next time we are adding lettuce and tomato to the mix!  I plan on making this for the Super Bowl, so if you are interested come on over!  Let me know how this recipe turns out for you, and what you add to your taco pizza!

Here's to full bellies!

Vanessa

Taco Pizza

2 cans of cresent rolls
1 lb. browned and drained ground beef (turkey would work great as well)
1 can of drained pinto beans
1 package of taco seasoning
1/2 cup of water
1/2 cup of shredded cheese
Toppings of your choice

1. Preheat the oven to 375F.
2. On a parchment lined cookie sheet, arrange the crescent rolls in a ring, overlapping the wide ends of the crescent roll.  Crescent roll points should be laid out with about 1" in between ends of points.  Center of ring circle will be lumpy with ends of crescent rolls, so flatten them out to form a bottom crust.
3. Mix cooked ground beef, water, taco seasoning and beans together.  Pour meat and beans mixture into center of crescent rolls. 
4. Sprinkle on 1/2 cup of cheese on top of meat and beans mixture.  Bring points of crescent rolls towards center of the pizza.
5. Bake for 20-25 minutes until rolls are browned.  Add toppings of choice and serve!


Monday, January 31, 2011

Mac and Chicken Casserole

I was really excited to FINALLY score some Kraft Homestyle Mac & Cheese and couldn't wait to use it.  After my original dinner plans were shot down (no ground turkey), we threw something together that was amazing and super simple!  The kids and my husband both all had two servings, and it really turned out well.  I made this casserole in about 30 minutes, and it was great.  Hope you enjoy it as much as we did!

Here's to full bellies!

Vanessa

Mac and Chicken Casserole

1 package Kraft Homestyle Mac & Cheese (we used the Asiago flavor)
1 small package of frozen mixed vegetables (we used corn, carrots and peas)
1 can of cheddar cheese soup, undiluted
2 cans of chopped chicken (sold near the canned tuna)
1/2 cup grated cheese (we used parmesan and it was awesome)
1/2 cup of italian bread crumbs
1/4 cup of milk (if needed)

1. Preheat oven to 350F. 
2. In a medium saucepan, bring macaroni and frozen veggies to a boil.  Cook for 6 minutes or until tender. Drain well and return to pan.
3. Prepare mac and cheese according to package directions.  Add in seasoning from mac and cheese, both cans of chicken and can of cheddar cheese soup. (Add in 1/4 cup of milk if needed to make sauce creamier)
4. Stir mixture to combine well. Pour mixture into glass baking dish.  Pour on bread crumbs from mac and cheese, 1/2 cup of grated cheese and 1/2 cup of italian bread crumbs.
5. Bake for 20 minutes or until cheese is bubbly. Serve and enjoy!


Sunday, January 30, 2011

Homemade Bailey's..... and Van Smitty Mudslides!

To complete the Van Smitty Mudslides recipe calls for homemade Bailey's Irish Cream.  As I said in my previous post, I heart Cupcake Project's blog, and while looking up the homemade Kahlua recipe, I also hunted down this recipe for Homemade Bailey's Irish Cream (click on the link for her recipe!).  I have never used Bailey's except in mudslides, and didn't even price the bottle at my favorite liquor store, Big Daddy's!  It just wouldn't be fun to make homemade mudslides without making EVERYTHING from scratch, so we gathered up the goods to make the Homemade Bailey's Irish Cream.  We pretty much just stuck to the recipe I found on Cupcake Project, and was quite pleased with the results.  I have also included the recipe for Van Smitty Mudslides, in case you have Kahlua laying around and just want to make the Bailey's!

Here's to full bellies!

Vanessa

Homemade Bailey's Irish Cream (as seen on Cupcake Project)

1 cup of heavy cream (you can also use light cream)
14 oz sweetened condensed milk
1 2/3 cup of Irish whiskey (we used Jameson's)
1 t. of instant coffee
2 T. of Hershey's chocolate syrup
1 t. of Mexican vanilla
1 t. of almond extract (I left this out)

1. Combine all ingredients in a blender on high.  Mix for 30 seconds.
2. Bottle in a tightly sealed container and refrigerate.
3. Should keep for up to 2 months (although ours is halfway gone after one night!)

Van Smitty Mudslides

3 oz. homemade Kahlua
3 oz. homemade Bailey's
2 oz. vodka
3-4 scoops of premium Blue Bell Vanilla **
5 cubes of ice

1. Combine all ingredients in blender (starting with 3 scoops of ice cream).
2. Blend on high until blended to your liking.
3. Add more ice cream or ice if need be.
4. Enjoy and repeat!
** Using good ice cream makes a difference! We tried this recipe with store brand ice cream, and our mudslides were more like milkshakes! Still good, but better with Blue Bell!

Homemade Kahlua

While the title may be confusing, the recipe is not!  I follow several blogs on the internet, and being a cupcake connoisseur, I love Cupcake Project!  She always has these fun cupcake ideas, and I stumbled across a recipe for Homemade Kahlua (click link for her blog post).  Having recently discovered mudslides, the alcholic milkhake for adults, and also being a self-proclaimed cheapskate, I was interested in the recipe!  I modified my recipe and ingredients a little, but overall it was the same result.  For those of you interested in the Diet Coke bottle part of the title, the recipe made quite a lot of Kahlua.... almost an entire litre!   Being fresh out of one litre containers and having just finished a 2L of Diet Coke, I rinsed it out and had myself a handy container!  I did remove the label and write Kahlua on it, so I don't pour myself a big glass of Kahlua on my way to work!  I have also included a recipe for deliciously easy mudslides below my Kahlua recipe!  Enjoy!

Here's to full bellies!

Vanessa

Homemade Kahlua (modified from recipe on Cupcake Project)

6 cups of freshly brewed coffee (We used Community coffee, but feel free to get fancy)
1 lb of light brown sugar (my loving husband measured it, by dumping in half of a 2 lb. bag!)
3 1/2 T. of Mexican dark vanilla
1/2 L of vodka (we used a vodka called Fris, recommended by a Big Daddy's Liquor employee)

1.  In a medium saucepan, combine the brewed coffee and light brown sugar, stirring to dissolve.
2. Heat over medium heat at a high simmer for 10 minutes to reduce.
3. Remove coffee/sugar mixture and let cool completely.
4. Add in vanilla and vodka, and store in a tightly sealed container.

Van Smitty Mudslides

3 oz. homemade Kahlua
3 oz. homemade Bailey's
2 oz. vodka
3-4 scoops of premium Blue Bell Vanilla **
5 cubes of ice

1. Combine all ingredients in blender (starting with 3 scoops of ice cream).
2. Blend on high until blended to your liking.
3. Add more ice cream or ice if need be.
4. Enjoy and repeat!
** Using good ice cream makes a difference!  We tried this recipe with store brand ice cream, and our mudslides were more like milkshakes!  Still good, but better with Blue Bell!

Saturday, January 22, 2011

German Chocolate Mini Bundts

One of my favorite baby mamas mentioned that she was having a craving for German Chocolate cupcakes, and after picking some up, her amazing dog ate them!   Not wanting the old wive's tale to come true (the one about a baby always having their mouth open if a mother doesn't satisfy a craving), I decided to whip up a batch.  I had been wanting to use my amazing mini bundt pans for a while now, and since strawberry rum cake isn't the best choice for pregnant women, I decided to do the German Chocolate mini bundts!  I used a double chocolate cake mix for the mini bundts, and prepared the cake mix according to directions.  I added 3 T. of instant decaf coffee, mixed in 1 T. of water, to the cake mix.  One cake mix made 24 mini bundts, and I intentionally overfilled them so they would have a solid bottom.  I baked the mini bundts for about 15 minutes, and let them cool in the pan for about 10 minutes.  My old friend Duncan Hines hooked me up with a delicious coconut pecan frosting, the German to the chocolate!  I put the frosting in a pastry bag without a tip, and squeezed in about 2 T. of frosting into the center of each mini bundt.  I then used a spatula to flatten down the frosting, giving the look of a little chocolate volcano!  I was very happy with the cupcakes, and hope my friend likes them as well!

Here's to full bellies!

Vanessa

German Chocolate Mini Bundts

Preheat oven to 350F.  Prepare chocolate cake according to directions.  Add in 3 T. of instant coffee, diluted with 1 T. of water.  Spray mini bundt pans with baking spray, or grease with vegetable oil.  Fill 24 mini bunts with cake batter, almost to the top.  Bake for 17-18 minutes or until bundts bounce back when pressed.  Let cool for 10 minutes in the pan.  Remove mini bundts from pan by first running a spatula around the edges, and then turning the pan over and tapping the pan.  Fill a pastry bag with coconut pecan frosting, and pipe approximately 2-3 T. of frosting into center of mini bundts.  Use a small spatula to flatten frosting over the top.

Greast mini bundt pan with baking spray or vegetable oil.

Fill mini bundt pans almost to the top with batter and bake!

Finished product... little German chocolate volcanos!


Champagne Icing

My sweet sister Theresa asked me to make some cupcakes for her co-worker's birthday, and with nothing to do, I agreed.  His request??? White cupcakes with white icing.  Could you get any more plain? :)  Since he didn't specify what "white" meant, I decided to put my own spin on the cupcakes.  I looked up my dear friend Betty Crocker, and grabbed a white cake mix.  I made the cupcakes according to the box and came up with 24 perfect cupcakes!  **Hint:  Using an ice cream scoop makes for cupcakes and muffins of exactly the same size and shape!**  Now, for the fun part.... the champagne icing! :)  I had a cupcake at a reputable cupcake bakery here in Dallas that offered pink champagne icing.  While the icing was delicious, the cupcake was dry and forgetable.  I Googled champagne icing recipes, and some were too heavy on the butter, while others had shortening.  I finally decided on a recipe that was simple and easy, and got to work.  After playing around with the temperature of the butter, I created the icing with two different consistencies.  One was a thicker icing, that would have been perfect to be piped onto cupcakes with a star shaped tip.  I decided to not get that fancy, and thinned the icing out to create a dipped or ganache look.  The icing was gorgeous, smooth and shiny.  My iPhone pictures do not do the icing justice!  I hope you enjoy this recipe I modified as much as I do!  Happy birthday, Bernie! :)

Here's to full bellies!

Vanessa

Champagne Icing

1 1/2 sticks of butter, slightly melted
4-5 cups of powdered sugar
2-4 T. of champagne

In a stand mixer, combine the butter and powdered sugar, one half cup at a time.  After three cups worth of powdered sugar, add in 2 T. of champagne.  Once your icing is to this point, it is up to your personal taste how much more champagne and powdered sugar you want to add.  I settled on 4 T. of champagne, and 4 and 1/4 cups of powdered sugar.  I like my icing for the "dipped" look a little thin but not too runny.  Pipe the icing onto cupcakes in a circular motion, allowing the icing to spread over the top until totally coated.

The finished product.... look how shiny they are!

Pin It


Tuesday, January 18, 2011

Inside Out Grilled Cheese

We had a box of breadsticks in the freezer, and the kids wanted to help with dinner, so we decided on Inside Out Grilled Cheese.  This was an easy recipe for the kids to make, and would make a great afternoon snack or quick lunch or dinner.  These would be great to dip in tomato soup, or with a pepper jack cheese!  We used the herb and garlic breadsticks, and they were awesome!  We plan on using this recipe a lot when we go meatless for Lent!

Here's to full bellies!

Vanessa

Inside Out Grilled Cheese

8 frozen breadsticks (also can use room temperature breadsticks)
8 slices of cheddar cheese

1. Preheat oven to 350F.
2. On ungreased cookie sheet, place 8 frozen breadsticks about 1" apart.
3. Bake breadsticks for 10 minutes or according to package directions.

4. Fold 8 cheese slices in half to create 16 triangles. (if using room temp. breadsticks, begin recipe here.)
5. Remove breadsticks from oven, and place two cheese triangles on each breadstick.
6. Put breadsticks back in oven for 5-7 minutes, or until cheese is melted and bubbly.
7. Serve warm with soup of your choice.

Breadsticks before.....

Inside Out Grilled Cheese after.... yum! :)


Texas Sized Kolaches

I was looking for something quick and easy to make for dinner, that I knew three somewhat picky kids would eat.  We ended up with quite the eclectic menu, but it was great!  For dinner, we had Texas sized kolaches, and they were amazing!  In 20 minutes, we were sitting down to dinner!  Here is the recipe below, and a picture. We used the honey butter flavored Grands biscuits, and the sweet of the biscuit with the savory of the beef sausage was amazing!  Try these dipped in regular or honey mustard!

Here's to full bellies!

Vanessa

Texas Sized Kolaches

1 can of Grands Honey Butter biscuits (8 count)
1/2 a package of beef or pork sausage (precooked)

1. Preheat your oven to 350F.
2. Open the can of biscuits and seperate into 8 individual biscuits.  Stretch each biscuit until it is about 50% larger in size.
3. Take half the "horseshoe" of beef sausage, and cut into four equal sections.  Cut each section in half lengthwise.
4.  Put one piece of sausage in the center of the biscuit, and roll both sides up to enclose sausage.
5.  Place kolache seam side down on an ungreased cookie sheet.
6. Bake kolaches for 15 minutes until golden brown.
7. Serve warm, and enjoy!

Monday, January 10, 2011

Cheesy Chicken, Broccoli & Rice Bake

With a busy night of homework, errands and Boy Scouts, I needed a quick fix meal that would be easy and filling.  After a quick check of the pantry, we decided on Cheesy Chicken, Broccoli & Rice Bake.  The whole process only took about 35 minutes, as we had multiple things going at once.  Hope you enjoy this dish as much as we did, it is quite good!  Leave me a comment and let me know how it worked out for you!  Don't forget to enter the Groovy Granola Giveaway as well, two winners will be picked this Thursday! :)

Here's to full bellies!

Vanessa

Cheesy Chicken, Broccoli & Rice Bake

1 can of cheese soup (Campbell's brand works best)
1 can of milk
4 boneless skinless chicken breasts, cubed
1 bag of steamable broccoli florets
1 box of instant brown rice
1 cup of shredded cheddar cheese

1.  Preheat oven to 350F.
2.  In a mixing bowl, combine the cheese soup and can of milk, and stir until well mixed.
3.  Pour cheese and milk mixture into a glass or ceramic casserole dish.
4.  Coat a skillet with olive oil cooking spray, and cook the chicken breasts until they are no longer pink, about 6 minutes.  Drain and add to cheese soup mixture, stirring to combine.
5.  In a saucepan, cook the box of instant brown according to directions.  Drain and add to the cheese soup mixture in the casserole dish, stirring to combine.
6.  Microwave the steamable broccoli florets according to directions, about 5 1/2 minutes.  Add to cheese soup mixture, stirring to combine.
7.  Sprinkle 1 cup of shredded cheddar cheese on top of chicken, broccoli & rice bake.  Cook at 350F for 20-25 minutes, until cheese is melted and bubbly.

Yield: 4-6 servings, perfect for large families or lunch leftovers! :)

Sunday, January 9, 2011

Groovy Granola

With the start of the new year, everyone is still trying to stick to their new year resolutions.  If one of those resolutions was to eat healthy, I have a great recipe for you!  This recipe is extremely easy to make, and the kids love helping out.  This recipe can probably be made with items you already have in the pantry, so it is a great cost effective recipe.  The granola can be added to spice up yogurt or oatmeal, and can be also be eaten as a healthy afternoon snack.  We use the granola to make our own yogurt parfaits.... McDonalds has nothing on us!  Layer yogurt and frozen berries twice, and top with granola for an energizing breakfast.  This recipe calls for raisins, but it is just as good with dried cranberries.  You can change the chopped walnuts for slivered almonds, or chopped pecans.  The possibilities are endless!  Post a comment and tell me how you make your granola!

Here's to full bellies!

Vanessa

Cinnamon Raisin Granola

3 cups rolled oats
1 cup chopped walnuts
3/4 cup sweetened shaved coconut
1/4 cup plus 2 tablespoons dark brown sugar
1/4 cup plus 2 tablespoons maple syrup
1/4 cup vegetable oil
3/4 teaspoon salt
1 tablespoon cinnamon
2 cups raisins

1. Preheat oven to 250F.
2. In large bowl, combine oats, nuts, coconut and brown sugar.
3. In a seperate bowl, comine maple syrup, oil, salt and cinnamon.
4. Combine both mixtures and pour onto 2 sheet pans.
5. Cook for 1 hour and 15 minutes, stirring every 15 minutes to acheive even color.
6. Remove from oven and transfer to large bowl.
7. Add raisins and mix until evenly distributed.

**Tip: I halved the granola into two bowls, and added 1 cup of raisins to one bowl, and 1 cup of dried cranberries to the other bowl.  This recipe yields about 5 cups of granola, so it is nice to have two different flavors!**


The ingredients! :)


Dry ingredients... looks good already!


Cinnamon Cranberry Granola!

Cinnamon Raisin Granola!


Friday, January 7, 2011

Pineapple "Stuffed" Cupcakes

Now you know I love some pineapple upside down cake, and I was really craving a cupcake tonight.  I had been doing some internet research to try and come up with a cupcake to enter in the Jelly Belly Cupcake Challenge, and I started cravin cupcakes! :)  I looked in the pantry and saw we had all the ingredients for pineapple upside down cake.  I made the cake mix according to the directions, and filled the cupcake liners 3/4 of the way full.  I baked the cupcakes on 350 degrees for 22 minutes.  Now came the fun part, the "stuffing" of the cupcakes.  Using a small knife, i cut out a cone shape in the center of each cupcake.  I melted 3 tablespoons of butter in the microwave, and mixed in about 1/2 cup of borwn sugar.  I then put in about a teaspoonful of the sugar/butter mixture into the hole I created in the cupcake.  We dropped in a cherry, and then removed a pinch from the "lid" of the cupcake.  We put the cupcake lid back on, and it was a perfect fit!  Next, I used a toothpick and poked holes all over the cupcake, and put another teaspoonful of sugar/butter mixture over the top.  The holes let the butter/sugar mixture soak into the cupcake.  While the cupcakes were cooling, I mixed up a cream cheese icing for the cupcakes.  I used 8 oz. of cream cheese, 1 cup of powdered sugar, 1 stick of butter, 4 pineapple rings, and 1 tablespoon of vanilla extract for the icing and blended it all together.  I got this recipe off of Martha Stewart's website, and must say I wasn't too impressed with the consistency.  It may have been from adding in the pineapple, but it was just thinner than I liked.  For this reason, I am not adding the cream cheese icing recipe, but will keep on the hunt for a better recipe to post for you!  I posted some pictures below of the final results.  Post a comment and let me know how the cupcakes work out for you! :)

Here's to full bellies!

Vanessa

Pineapple Cake

1 box of Duncan Hines Pineapple Supreme cake mix
3 eggs
1 1/3 cup of water
1/3 cup of vegetable oil (can also sub for 1/3 cup of unsweetened applesauce)

Mix all ingredients for 2 minutes on medium speed until well mixed.  Fill cupcake liners 3/4 of the way full.  Bake for 22 minutes at 350 degrees until cupcakes are golden brown.

Butter/Brown Sugar mixture in cupcake

Add in the cherries!

Butter/Brown Sugar on top of cupcakes

Finished product: with icing and pineapple garnish


Wednesday, January 5, 2011

Diabetic Dinner Idea

Many of us have a sweet tooth, and some of us unfortunately have that tooth yanked by the doctor with a diabetes diagnosis.  One of my sweet friends was recently diagnosed as being diabetic, and his lovely new bride contacted me about some healthy recipes to help her husband transition to a healthier diet.  Being diabetic doesn't mean you have to be on a sugar free diet, but it does involve monitoring of the blood sugar to balance body glucose levels.  Now, I'm not a doctor, nor do I claim to be, but I try and live a low-sugar lifestyle, and enjoy modifying recipes to cut the sugar content.  One of the easiest ways to cut sugar but not the flavor is by using applesauce as a substitution.  One of my favorite recipes to use applesauce in has got to be carrot cake, as the applesauce makes for a more moist, delicious cake that what you would get with sugar.  The natural sugars from the apple give the same effect of sweetening the cake, but it is a healthier version.  Being diabetic means regulating the amount of proteins, fats and carbs that you take in to help maintain proper glucose levels.  Excess carbs can convert to sugar in the body, and can throw glucose levels out of balance.  Below I have posted two low carb, low sugar recipes, sure to be a crowd pleaser for diabetics and non-diabetics alike.  Both recipes were pulled from The Mayo Clinic website, and both are excellent!  Post a comment and let me know how your chicken salad and carrot cake turned out! :)

Here's to full bellies!

Vanessa

Buttermilk Chicken Salad

For the dressing:
1/3 cup fat-free mayonnaise
1/4 cup buttermilk
2 tablespoons fresh dill, finely chopped
1 teaspoon minced garlic
Cracked black pepper, to taste

For the salad:
4 boneless, skinless chicken breasts, each 4 ounces
2 teaspoons extra-virgin olive oil
8 cups torn salad greens
1 red bell pepper, sliced
1/2 sweet onion (Vidalia is best), sliced

Directions:

To make the dressing, in a small bowl, combine the mayonnaise, buttermilk, dill, garlic and black pepper. Whisk until smooth. Cover and refrigerate until needed.

Prepare a hot fire in a charcoal grill or heat a gas grill or broiler (grill). Away from the heat source, lightly coat the grill rack or broiler pan with cooking spray. Position the cooking rack 4 to 6 inches from the heat source.

Brush the chicken breasts with olive oil. Grill or broil until browned and just cooked through, about 5 minutes on each side. Transfer the chicken to a cutting board and let rest 5 minutes before slicing into strips.

In a large bowl, combine the salad greens, bell pepper, onion and most of the dressing. Toss to mix well.

Transfer the salad to individual plates. Add the sliced chicken and drizzle with the remaining dressing. Serve immediately.

186 Calories per serving, Serves 4


Carrot Cake

For the cake:
1 1/3 cups shredded carrots
 3 cups water
2 cups all-purpose (plain) flour
2 cups sugar
2 teaspoons baking soda
2 teaspoons ground cinnamon
1/2 cup corn oil
1/2 cup applesauce
5 egg whites from large eggs
2 teaspoons vanilla
1/4 cup chopped walnuts
1/2 cup coconut
1/2 cup canned, crushed pineapple (in own juice), drained

For the frosting:
4 ounces fat-free cream cheese spread, at room temperature
3/4 cup powdered sugar
3/4 teaspoon vanilla extract
1 teaspoon lemon juice

Directions:

Preheat the oven to 350 F. Lightly coat a 9-by-13-inch cake pan with cooking spray. Dust with a bit of flour (about 1 tablespoon) and turn the pan over to remove most of it.

In a medium saucepan, add the carrots and water. Bring to a boil and cook for 5 minutes. Drain the water and set aside to cool.

In a large bowl, whisk together the flour, sugar, baking soda and cinnamon.

In another bowl, using an electric mixer on low speed, beat together the oil, applesauce, egg whites and vanilla. Add the flour mixture and beat until well blended. Fold in the cooked carrots, walnuts, coconut and pineapple.

Pour the batter into the prepared pan. Bake until a toothpick inserted into the center of the cake comes out clean, about 1 hour. Let cool in the pan on a wire rack for 10 minutes. Remove the cake from the pan and let cool completely on the cooling rack, about 1 hour.

To make the frosting, using an electric mixer slowly beat the cream cheese in a small mixing bowl. Add the powdered sugar slowly and continue beating. Add the vanilla and lemon juice. Mix until smooth. Frost the top and sides of the cake.

390 Calories per serving, Serves 12


Tuesday, January 4, 2011

Mexican Fiesta

My husband has been craving some Oaxaca Fried Chicken Bites for forever, but with trying to be healthy eaters, fried food was never on the menu.  Since he took such great care of me when I was sick last week, I decided to make him one of his favorite meals.  Oaxaca Fried Chicken Bites are stuffed with avocado and pepper jack cheese, breaded in seasoned bread crumbs, and then fried to golden deliciousness.  They go best with Chipotle Sauce from QT or Racetrac.... yes, you can buy the stuff from the gas station!  We also had some Chicken, Conchas & Chile Caldo, which is easy and delicious.  I made it as a soup for my sister Theresa, who is feeling slightly under the weather, and let the conchas soak up some of the juice so I could serve it as a delicious side.  Here are the recipes below, enjoy!  Leave me a comment and let me know how they turn out for you!  The chicken bites make fantastic appetizers for parties, they are always a crowd pleaser for us!

Here's to full bellies! :)

Vanessa

Oaxaca Fried Chicken Bites
3-4 boneless, skinless chicken breasts
1 avocado, cut in half and sliced
1/2 lb. of pepper jack cheese, shredded
1 egg (optional)
Seasoned bread crumbs
peanut or olive oil

Cut each chicken breast into thirds.  Cut a small slit in the chicken breast, creating a small pocket.  Try not to cut all the way through or all the way to each side.  Divide the avocado slices evenly amongst the chicken breasts and stuff in the small pockets you created.  Next, add 1-2 T. of pepper jack into the pockets with the avocado.  Use two toothpicks to hold the avocado and cheese inside the pocket.  Pour 1 cup of seasoned bread crumbs into a shallow bowl or plate.  If using the egg, whip the egg in a small bowl, and dip each chicken bite into the egg mixture.  Immediately roll the chicken bite in the seasoned bread crumbs.  (I usually don't use the egg, and the chicken comes out great either way!)  In a skillet, heat about 1 cup of oil to where it just starts popping; turn the heat down to medium.  Using tongs, gently set the chicken bites into the hot oil and cover with a lid.  Cook chicken until brown and crispy, turning 2-3 times during the cooking process.  Depending on size and thickness of chicken, chicken should take 7-12 minutes.  Juices from chicken should run clear.  Set on a paper plate or paper towels to collect excess grease.  Serve hot with chipotle sauce.

Chicken, Conchas & Chile Caldo
3-4 chicken breasts, diced into small pieces
1 large box or can of chicken broth
1 small can of Rotel
1/2 cup of chopped onion (or 3 T. of dried onion)
2 T. of minced garlic
1 cup each of carrots, corn, and peas (or whatever veggies you like!)
1 small bag of noodles (conchas, elbow, spiral, bowtie, etc)

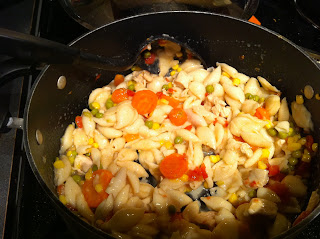
In a soup pot, pour in chicken broth, Rotel, onions, garlic, and raw chicken.  Bring to rolling bowl and reduce heat.  Add in noodles and veggies, and cook for 15 minutes or until chicken is cooked thoroughly.  Season as desired!  This soup is very quick and easy, and can be served as a side or main course.  This soup tastes great with tortilla chips, sliced avocado and shredded cheese, but get creative! :)  As soup sits, pasta may absorb some of the liquid, so I usually have leftovers as a side instead of as a soup!  My kids love this soup, and always get seconds and thirds!  Definitely an easy crowd pleaser!

 Picture of the chicken with the slits cut in them!

 Chicken bites stuffed and starting to cook!  Also made avocado & cheese balls, yum!

 Chicken bites frying up nicely...

 The finished product.... delicious! :)

A quick picture of the Chicken, Conchas & Chile Caldo before the kids ate it all! :)

Pin It


Monday, January 3, 2011

A Real 20 Minute Meal

My original plans for dinner went a little south tonight, once I realized my two avocados were a bust.  I shelved the Oaxaca Fried Chicken Bites for tomorrow, and had to improvise.  Here is my plan for a real, food-on-the-table-in-20-minutes meal that is fast and easy for a busy weeknight dinner.

With 20 minutes on the clock:

Breaded Cheesey Chicken Strips
3-4 chicken breasts
Saltine crackers
Shredded cheese (any works, cheddar, mozzerella, parmesan, etc)

Preheat the oven to 375 degrees, and line a cookie sheet with a piece of aluminum foil.  Spray the tin foil generously with cooking spray, to prevent the chicken from sticking.  Take 3-4 chicken breasts and slice thinly (hot dog style) while they are still cold.  On a plate or shallow bowl, crush half to 3/4 of a sleeve of saltine crackers, and add half a cup of shredded cheese.  DO NOT ADD SALT if you use regular saltines!  Toss the cheese and crushed crackers with a little pepper and dried onions.  Dip a few strips into the saltine mix and lay out on foil lined cookie sheet.  Continue until all chicken strips are coated.  Pop these in the oven for 15-18 minutes, and until cheese is melted.

With 15 minutes on the clock:

Easy Mexican Rice
1/2 bag of long grain white rice (not instant)
1/4 cup of chopped onion (2 T. of dried onions works as well)
1 small can of tomato sauce
1 small can of drained veggies (peas & carrots, VegAll, or corn are my favorites)
1 LARGE glass of water

In a large skillet, heat 1/2 c of cooking oil.  Add in rice and onions, and open the tomato sauce and veggies.  Stir rice and onions until the rice starts to take on a white, toasted color, and the onions are soft.  Working quickly pour in the tomato sauce and stir rapidly.  Then add in half a cup of water, until rice is compeletely covered.  Add in the can of veggies and stir.  Add the other half of the water so that it is a soup consistency (about twice the water than rice).  Let rice come to a boil and cover with a lid.  Turn rice down to medium heat and check on it every few minutes.  DO NOT STIR THE RICE.  Add more water if the water boils off before the rice is tender, but just enough to wet it (not soup consistency again).  Season as desired.

With 6 minutes on the clock:

1 bag of your favorite steamed veggies!  These usually take 4 1/2 - 6 1/2 minutes in the microwave.  We had the Green Giant Red Potatoes and Green Beans in Rosemary Sauce, yum!! :)

In just under 20 minutes, and for less than $10, you will have a quick and easy week night dinner that the kids will devour.  Come back tomorrow for some Oaxaca Fried Chicken Bites, yum! :)

Here's to full bellies!

Vanessa

Here is our finished product!  Of course it is my night to do dishes, so we are using paper plates! :)

Sunday, January 2, 2011

Need A No Fail Sugar Cookie Recipe?

To all my bakers out there, I might have just perfected the sugar cookie recipe this past holiday season.  If you are looking for a real, no fail sugar cookie recipe, than you have come to the right place!  This recipe is perfect for cookie cutters, as the cookies don't turn in to big blobs during baking.  You can place these cookies very close together on the cookie sheet, as there is very minimal expansion.  The cookies also do not have that weird, sugar cookie after taste, which is a big turn off for many.  This recipe will be a staple in your kitchen, and can easily be reduced.  I have included some pictures of cookies my kids, family and friends were able to create using the sugar cookie recipe.  Post a comment with your experiences or pictures and let me know how your cookies turn out!

Here's to full bellies!

Vanessa

Vanessa's No Fail Sugar Cookies

2 cups butter
2 cups granulated sugar
2 eggs
2 t. vanilla extract (can substitute almond extract as well)
6 cups flour
3 t. baking powder
1 t. salt

Cream butter and sugar until light and fluffy.  Add eggs and vanilla (or almond extract).  In a seperate bowl, mix dry ingredients well.  While mixing on low speed, add dry ingredients by the cupful to wet ingredients.  mix until flour mixture is incorporated and the dough comes together.

Lay one sheet of wax paper on cutting board, and dump out dough ball.  Cover dough ball with second sheet of wax paper and roll out using a rolling pin to 1/4"-1//2" thickness.  Place dough in refrigerator for 30 minutes to an hour to chill thoroughly.

Preheat oven to 350 degrees.  Remove dough from refrigerator and remove top sheet of wax paper.  Using desired cutters, cut out shapes from dough, moving quickly to keep dough chilled.  Place cut out shapes on parchment paper-lined cookie sheets and bake for 8-10 minutes or until edges brown.

Continue re-rolling dough out between two sheets of wax paper and chilling dough until all dough is used. 

Yield: up to 5 dozen 3" sugar cookies.  (Half the recipe if you need a smaller yield of cookies.)


Sugar cookie "gingerbread" men

Sugar cookies the kids decorated

Sugar cookies iced and decorated

Ready for the Christmas Eve party!  The sugar cookies were a big hit! :)


Sunday Lunch at Fuzzy's Taco Shop

For my last day of vacation, I decided to try out the new Farmers Branch location of Fuzzy's Taco Shop with the family.  I had heard lots of different reviews on Fuzzy's so we decided to see what all the hype was about, and if it was even true.

When we got to the restaurant, there was an impressively extensive menu, and a very clean restaurant.  The cashier had customer service skills that left a lot to be desired, and seemed a little unenthusiastic to be taking my order. When he asked my daughter what she wanted as a side, she asked for rice, but he didn't hear her.  He then asked her in an even louder, irritated tone, and she repeated her request.  Two kids meals, a taco, a cup of soup, taco plate and two drinks ran us about $22.00, and I was a little shocked at the price.

When we sat down and got our drinks from the fountain, we got a small basket of chips and two little cups of salsa.  The chips had a little seasoned salt on them, which were pretty tasty, but the salsa tasted like your run of the mill taco sauce, just hotter.

When our food came, I was impressed with the fresh ingredients and nice presentation.  The taco came in a paper lined basket, the soup in a small coffee cup-like container, and everything else on large plates.  I started off with my tortilla soup, which I was disappointed came only with three chips stuck in it.  The soup was very thick, almost too thick, and had a nice mix of veggies, beans and cheese.  The thickness and consistency of the soup stock made it a little unappetizing, and having tortilla strips or more chips to add to it may have made the soup a little better.  After a few bites of the soup, I decided to move on to the main course, my chicken crispy taco.  I took a bite of my chicken crispy taco, and was not impressed with the seasoning of the meat.  The lettuce, cheese, tomatoes and cilantro were fresh and cold, but the chicken was bland.  After my first bite, I decided I would spice it up a little by adding a little sauce. BIG MISTAKE.  The hot sauce on the taco made it so unbearably hot, I wasn't even able to finish the taco.  My mouth burned for about 5 minutes, and since I am still recovering from a respiratory infection, I coughed so hard I swore I was going to have an asthma attack!  I was able to scrape off a little of the lettuce and tomato to eat, but my $1.99 taco was ruined. 

My daughter had the soft chicken taco kid's meal, and got her taco with a side of rice.  At least I think it was supposed to be rice.  The rice had some tomatoes and corn mixed in, but had a very greasy coating.  The rice was overcooked and underseasoned, and after just a few bites, my daughter decided it wasn't any good.  Her taco looked pretty good, but she was turned off by the white sauce that came with the taco.  I think the sauce was supposed to be something garlic based, but the mayo undertones overpowered the garlic.  So, along with my tortilla soup and crispy chicken taco, her $3.49 kid's meal was also a dud, as she decided to just make a PBJ sandwich at home.  My son got the cheese nachos kid's meal, and it came on a GIANT plate, which could be a good and a bad thing.  The kid's meal could have easily been shared by 2-3 kids, if they had put a little more cheese on it.  The nachos had both a white cheese sauce and shredded cheese on it, neither of which were very hot or melted.  My son enjoyed his nachos, but left more than half still on the plate.  My husband had the chicken taco plate, and after my hot sauce experience, decided to just eat his tacos bland.  He also was not impressed with the rice served with his meal.

Overall, I don't think we will be back to Fuzzy's Taco Shop, unless it is to try something different on the menu.  I have heard they have great margaritas and quesadillas, so maybe if I make it in again I will try those.  I have posted a few pictures and my ratings below, based on my experience at the store.  I understand you may have had a different experience, so feel free to leave a comment below and tell me about it!

Here's to full bellies!

Vanessa

Awesomeness Rating (Scale of 1-10):
5.... because the restaurant was very clean, had a large menu, and cool large drink cups

Rate of Return (Scale of 1-4):
2... highly unlikely we will be back

Customer Service (Scale of 1-10):
4.... The cashier left a lot to be desired, and was not helpful to us first timers.  But the table busser did say "Excuse me, ma'am" when passing by, so that earned a few extra points.

Cleanliness (Scale of 1-4):
4.... The table busser immediately cleaned tables when they were emptied, and the cashier did come clear some trays for us before we left

Biggest Pro:
If you get a large drink, you do get a snazzy plastic Fuzzy's Taco Shop cup!

Biggest Con:
The hot sauce will totally ruin your meal if you are not a fan of scorching hot sauce.  Having some options in level of heat would be nice, or a salt and pepper shaker would also be appreciated.

Isaiah and his Cheese Nachos

My pretty chicken crispy taco

The amazing plastic cup :)